Introduction
Ever wonder why the air in your home feels extra dry, especially when winter rolls around or when the air conditioner is cranked up at night? You’re not alone! Many people face this issue, and luckily, there’s a simple solution—a humidifier. Whether you’re trying to sleep better or want to improve the overall air quality in your home, humidifiers can make a big difference.
But how do you actually set one up? Don’t worry. In this guide, I’ll walk you through the easy steps to set up your humidifier, whether you have a traditional model or a specific one like the Safety First or Canopy humidifier. Plus, I’ll give you some tips on how to maintain it so it keeps working like new.
Ready to get started? Let’s dive in!
Why Use a Humidifier? (Benefits Section)
You might be wondering, “Why should I even bother with a humidifier?” Well, the benefits go beyond just adding moisture to the air. Whether it’s during the dry winter months or when your air conditioner is on full blast, here are some key reasons why a humidifier can be a game-changer:
- Better Sleep: Dry air can irritate your throat and nasal passages, leading to snoring and restless sleep. A humidifier helps you breathe more comfortably at night, keeping those airways nice and moist.
- Healthier Skin: Say goodbye to flaky skin! When the air is dry, your skin loses moisture. Using a humidifier can keep your skin hydrated and glowing, especially during those cold, dry months.
- Relief for Sinus and Allergy Sufferers: If you’re prone to allergies or sinus issues, dry air can make them worse. A humidifier adds moisture to the air, soothing irritated nasal passages and reducing the risk of nosebleeds.
- Improved Air Quality: Humidifiers can help with more than just dryness—they reduce static electricity and can even keep wooden furniture from cracking due to low humidity.
Adding a humidifier to your home isn’t just about comfort; it’s about creating a healthier environment for everyone in the household.
General Steps for Setting Up Any Humidifier
Now that we know the benefits, let’s get to the heart of it: how to set up your humidifier. Whether you’re dealing with a standard model or something a bit more specialized, most humidifiers follow a similar setup process. Here’s how to get yours running in no time:
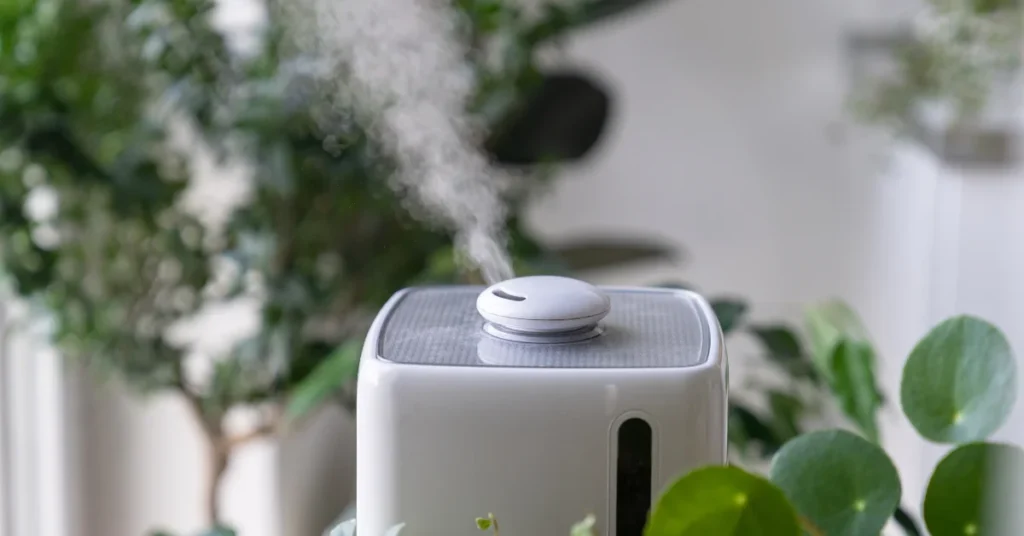
Step 1: Unbox Your Humidifier
Remove all parts from the packaging. Most humidifiers will come with a water tank, base, and sometimes additional items like filters or pads. Make sure you have everything before you start.
Step 2: Fill the Water Tank
Carefully remove the water tank and fill it with clean, cool water. Pro tip: If your water is hard (high in minerals), using distilled water can prevent mineral buildup inside the unit.
Step 3: Install Filters or Pads (If Applicable)
Some humidifiers, especially evaporative ones, use a filter or pad to help distribute moisture. If your model comes with one, make sure it’s correctly inserted before moving on.
Step 4: Place the Humidifier in a Safe Location
Choose a flat surface where the humidifier won’t tip over. It’s best to place it in the middle of the room or a few feet away from walls and electronics to allow proper air circulation.
Step 5: Power It On and Set Your Preferences
Once filled and placed, plug the humidifier in. Most models have adjustable settings for mist levels—start on low and adjust based on how dry your room feels.
Step 6: Monitor Humidity Levels
It’s a good idea to keep an eye on the humidity in your room. You don’t want the air to be too humid, as this can encourage mold growth. A humidity level of 30-50% is usually ideal.
Following these steps will ensure your humidifier is set up properly and working efficiently. Next, let’s dive into specific instructions for popular models like the Safety First humidifier.
How to Fill and Use a Safety First Humidifier
If you’ve got a Safety First humidifier, you’re probably looking for a simple and safe way to add moisture to your child’s room or any space where dry air is a problem. This popular model is known for its child-friendly design, but how exactly do you set it up?
Follow these easy steps to get your Safety First humidifier up and running:

Step 1: Remove and Fill the Water Tank
- First, unplug the humidifier if it’s connected. Then, carefully remove the water tank from the base.
- Take the tank to a sink and fill it with cool water. Tip: Avoid overfilling it—there should be a fill line to guide you.
- Once filled, secure the cap tightly to prevent leaks.
Step 2: Insert the Tank Back into the Base
After filling, place the water tank back onto the base of the humidifier. You should hear a slight “click” or feel it securely fit into place.
Step 3: Adjust the Settings
Turn the unit on by using the control knob or button. The Safety First humidifier usually has multiple mist settings (low, medium, high). Choose a setting based on your needs—if it’s a child’s room, low or medium is often best.
Step 4: Position It Safely
This is especially important in a baby’s room. Place the humidifier on a flat, stable surface at least a few feet away from the crib or bed. Keep it out of reach of small hands!
Step 5: Maintenance Tips
To keep your Safety First humidifier running smoothly, it’s a good idea to clean it weekly. This prevents mold and bacteria from building up inside the unit, ensuring your child’s air stays fresh and clean.
Now that your Safety First humidifier is set up, you can rest easy knowing your room or your child’s space will stay comfortably humidified.
How to Replace a Humidifier Pad
Replacing a humidifier pad is a crucial part of keeping your unit in good shape and ensuring it functions efficiently. Over time, pads can become clogged with minerals, dust, or even mold, which reduces the humidifier’s ability to add moisture to the air.
Here’s how to replace a humidifier pad step by step:

Step 1: Turn Off and Unplug the Humidifier
Always start by turning off the unit and unplugging it from the power source. Safety first!
Step 2: Access the Humidifier Pad
- Depending on your humidifier model, the pad is usually located inside the base or behind a removable panel. For evaporative humidifiers, you’ll often find the pad near the water reservoir.
- Remove any screws or latches holding the panel or cover in place.
Step 3: Remove the Old Humidifier Pad
Carefully pull out the old pad, making sure to avoid spilling any excess water or residue. If the pad looks crusty or discolored, it’s definitely time for a replacement.
Step 4: Insert the New Humidifier Pad
- Take the new pad and position it exactly where the old one was. Make sure it’s snugly in place so the humidifier can work efficiently.
- Reattach any panels or covers and ensure everything is secure.
Step 5: Reassemble and Test the Humidifier
Put the humidifier back together, plug it in, and power it on. Check to make sure the humidifier is working properly and that the new pad is absorbing and distributing water as it should.
Maintenance Tip:
Depending on how frequently you use the humidifier, you may need to replace the pad every 1-3 months. Check it regularly to ensure it’s not clogged or dirty.
Replacing the pad is a quick and easy way to keep your humidifier running smoothly, ensuring you’re getting clean, well-humidified air.
How to Use a Canopy Humidifier
The Canopy humidifier is known for its sleek, no-mist design, making it a popular choice for those who want to avoid water residue on surfaces. It’s also ideal for overnight use, especially in bedrooms. Setting up and maintaining a Canopy humidifier is slightly different from traditional models, but don’t worry—it’s just as easy!
Here’s a step-by-step guide to getting your Canopy humidifier running smoothly:
Step 1: Unbox and Assemble Your Canopy Humidifier
- Start by removing all components from the box. You should have the water tank, a base unit, and Canopy’s signature paper filters.
- Assemble the humidifier by placing the filter in the designated area. The Canopy humidifier doesn’t use a traditional mist system, so the filter helps disperse moisture evenly into the air.
Step 2: Fill the Water Tank
- Remove the water tank and fill it with cool water. Canopy recommends using tap water, as the filter will take care of any impurities. However, if you have particularly hard water, distilled water may be a good option.
- Once filled, secure the cap and place the tank back onto the base.
Step 3: Place the Humidifier in Your Room
Set the humidifier on a stable surface, preferably in the center of the room or at least a few feet away from walls. Since it’s a no-mist model, you won’t have to worry about wet surfaces near the unit.
Step 4: Turn It On
Power on the Canopy humidifier and adjust the settings. You’ll notice it operates quietly, which is perfect for nighttime use, especially in bedrooms.
Step 5: Clean the Unit Regularly
One of the best things about the Canopy humidifier is its easy maintenance. Every week, rinse the water tank and base with mild soap and water. The paper filters can be replaced every 6 weeks or as needed, depending on use.
Bonus: Using Canopy at Night
Canopy humidifiers are designed to run quietly, making them ideal for overnight use. Place it near your bed for optimal moisture levels throughout the night without any distracting mist or sound.
With its sleek design and ease of use, the Canopy humidifier is a perfect choice for anyone looking to humidify their space, especially while sleeping.
How to Humidify a Room with Air Conditioning at Night
Air conditioning is great for cooling down your space, especially during hot summer nights, but it can also make the air in your room incredibly dry. So how do you maintain a comfortable humidity level while the AC is blasting? Here are some tips to keep your room humidified at night, even with the air conditioner running:

Step 1: Place the Humidifier in the Right Spot
The key to balancing air conditioning and humidity is proper placement. Avoid putting the humidifier directly in front of the AC vent, as this will prevent it from working effectively. Instead, place it near your bed, but away from cold drafts.
Step 2: Close Doors and Windows
To keep the moisture inside, make sure all doors and windows are shut while the humidifier is on. This helps maintain a balanced environment where the AC cools the room, but the humidifier keeps it from becoming too dry.
Step 3: Use a Humidity Monitor
It’s easy to over-humidify when using a humidifier and air conditioner together, so using a small humidity monitor can help you track moisture levels in real-time. Ideally, you want to aim for a humidity level of 30-50% for the most comfortable sleep without encouraging mold growth.
Step 4: Run the Humidifier on Low
Since air conditioning already reduces the moisture in the air, you don’t need the humidifier working overtime. Set it to a low or medium setting overnight. This should add enough moisture to balance out the AC without making the room feel damp.
Step 5: Refill and Clean the Humidifier Regularly
If you’re running your humidifier every night, it’s important to refill the water tank regularly and clean it at least once a week to prevent mold or bacteria buildup. This will keep the air fresh and safe to breathe.
Balancing the air conditioning with a humidifier can make a huge difference in your comfort at night, ensuring you wake up refreshed without the dryness that AC often causes.
Maintenance Tips for Keeping Your Humidifier in Top Shape
To ensure your humidifier works efficiently and continues to provide clean, moist air, regular maintenance is essential. Neglecting your humidifier can lead to mold, bacteria buildup, and reduced performance. Here’s how to keep your unit in top condition:
Daily Maintenance:
Empty and Refill the Water Tank: After each use, especially if you’re running it overnight, empty any remaining water from the tank. Stagnant water can become a breeding ground for bacteria. Refill with fresh water before each use.
Weekly Cleaning:
Clean the Water Tank and Base: Once a week, give your humidifier a thorough cleaning. Remove the tank and base, and wash them with warm, soapy water. If mineral deposits are present, use a mix of water and white vinegar to gently scrub the tank and base, removing any buildup.
Rinse the Filter or Replace It as Needed: Some models come with filters that need to be rinsed out weekly, while others, like evaporative humidifiers, may require the replacement of humidifier pads (as mentioned earlier). Make sure to follow the manufacturer’s instructions on cleaning or replacing these parts.
Monthly or Seasonal Maintenance:
Deep Clean and Descale the Humidifier: If you use your humidifier frequently, it’s a good idea to do a deeper clean at least once a month. Soak parts in a solution of water and vinegar to descale any hard water deposits. Make sure to rinse thoroughly afterward.
Check for Mold and Mildew
Inspect the Tank and Components: Regularly check for any signs of mold or mildew, particularly in the water tank, base, and around the filter. If you notice any, clean the unit immediately or replace parts that may be affected, such as the filter or pad.
Filter and Pad Replacement Schedules
Follow Replacement Guidelines: For filters, follow the manufacturer’s recommendation, typically every 1-3 months, depending on use. Pads should be replaced whenever they appear worn or clogged.
Avoid Hard Water Damage
Use Distilled Water: If your home has hard water, using distilled water can prevent mineral buildup inside the humidifier. Over time, hard water can create white dust and reduce the efficiency of the unit.
By following these simple maintenance tips, you’ll ensure that your humidifier continues to work effectively, keeping your air fresh, clean, and properly humidified.
Conclusion
Humidifiers are an excellent tool for maintaining a comfortable and healthy indoor environment, whether you’re trying to combat dry winter air or balance the dryness caused by air conditioning. From improving your sleep to keeping your skin hydrated, there are so many benefits to adding a bit of moisture back into your air.
By following the steps outlined in this guide, you can easily set up any humidifier, from basic models to popular brands like Safety First and Canopy. Plus, with regular maintenance, your humidifier will stay in top shape, providing you with clean, well-humidified air year-round.
So, whether you’re looking to help your baby sleep better, relieve sinus problems, or just feel more comfortable in your home, setting up and maintaining your humidifier is a breeze.
